
Built the site in Local, XAMPP, MAMP, Docker or on a staging subdomain? Moving it live usually means exporting the database, uploading wp-content by FTP and replacing every localhost URL. 1-Click Migration does it with a backup on the local or staging site and a restore code on the live server.
Move WordPress from localhost to a live server
- Make sure the local site is connected to the internet. It uploads the backup to cloud storage.
- Install 1-Click Migration on the local site and deactivate every other plugin.
- Go to Tools → One Click Migration, enter your email and click Start backup. Keep the email with the 8-character restore code.
- On the live server, install WordPress and 1-Click Migration, and delete any other plugins the host pre-installed.
- Paste the restore code, click Check backup & restore, then start the restore.
- Log in with the usernames and passwords from the local site, then reactivate your plugins.
The local site’s address, such as http://localhost:8888/mysite or https://mysite.local, is replaced with the live address throughout the database. If the check finds other local addresses in the backup, such as 127.0.0.1, it lists them so you can choose to rewrite them too.
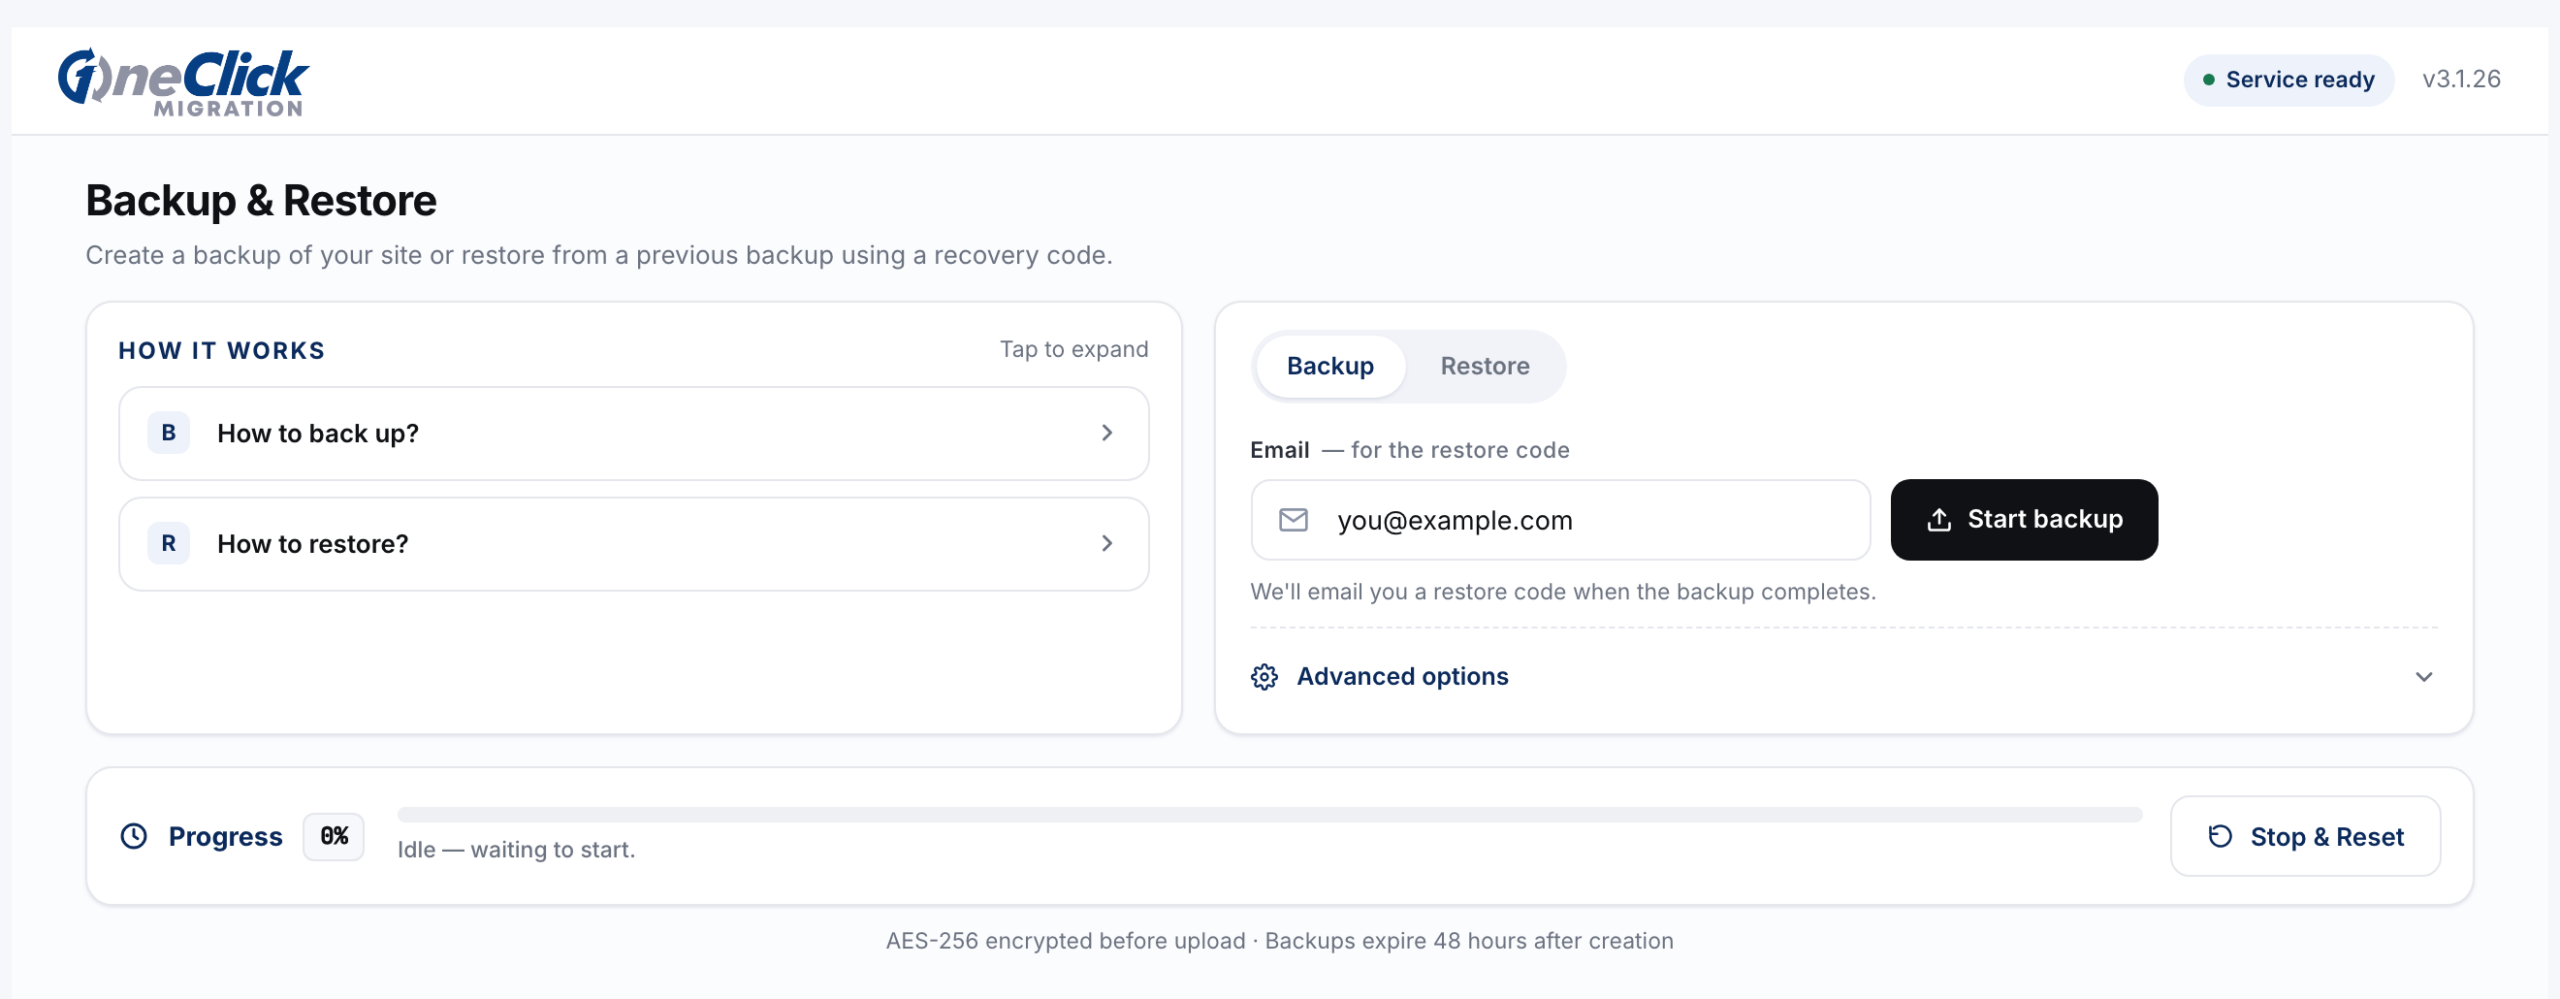
Push staging to live
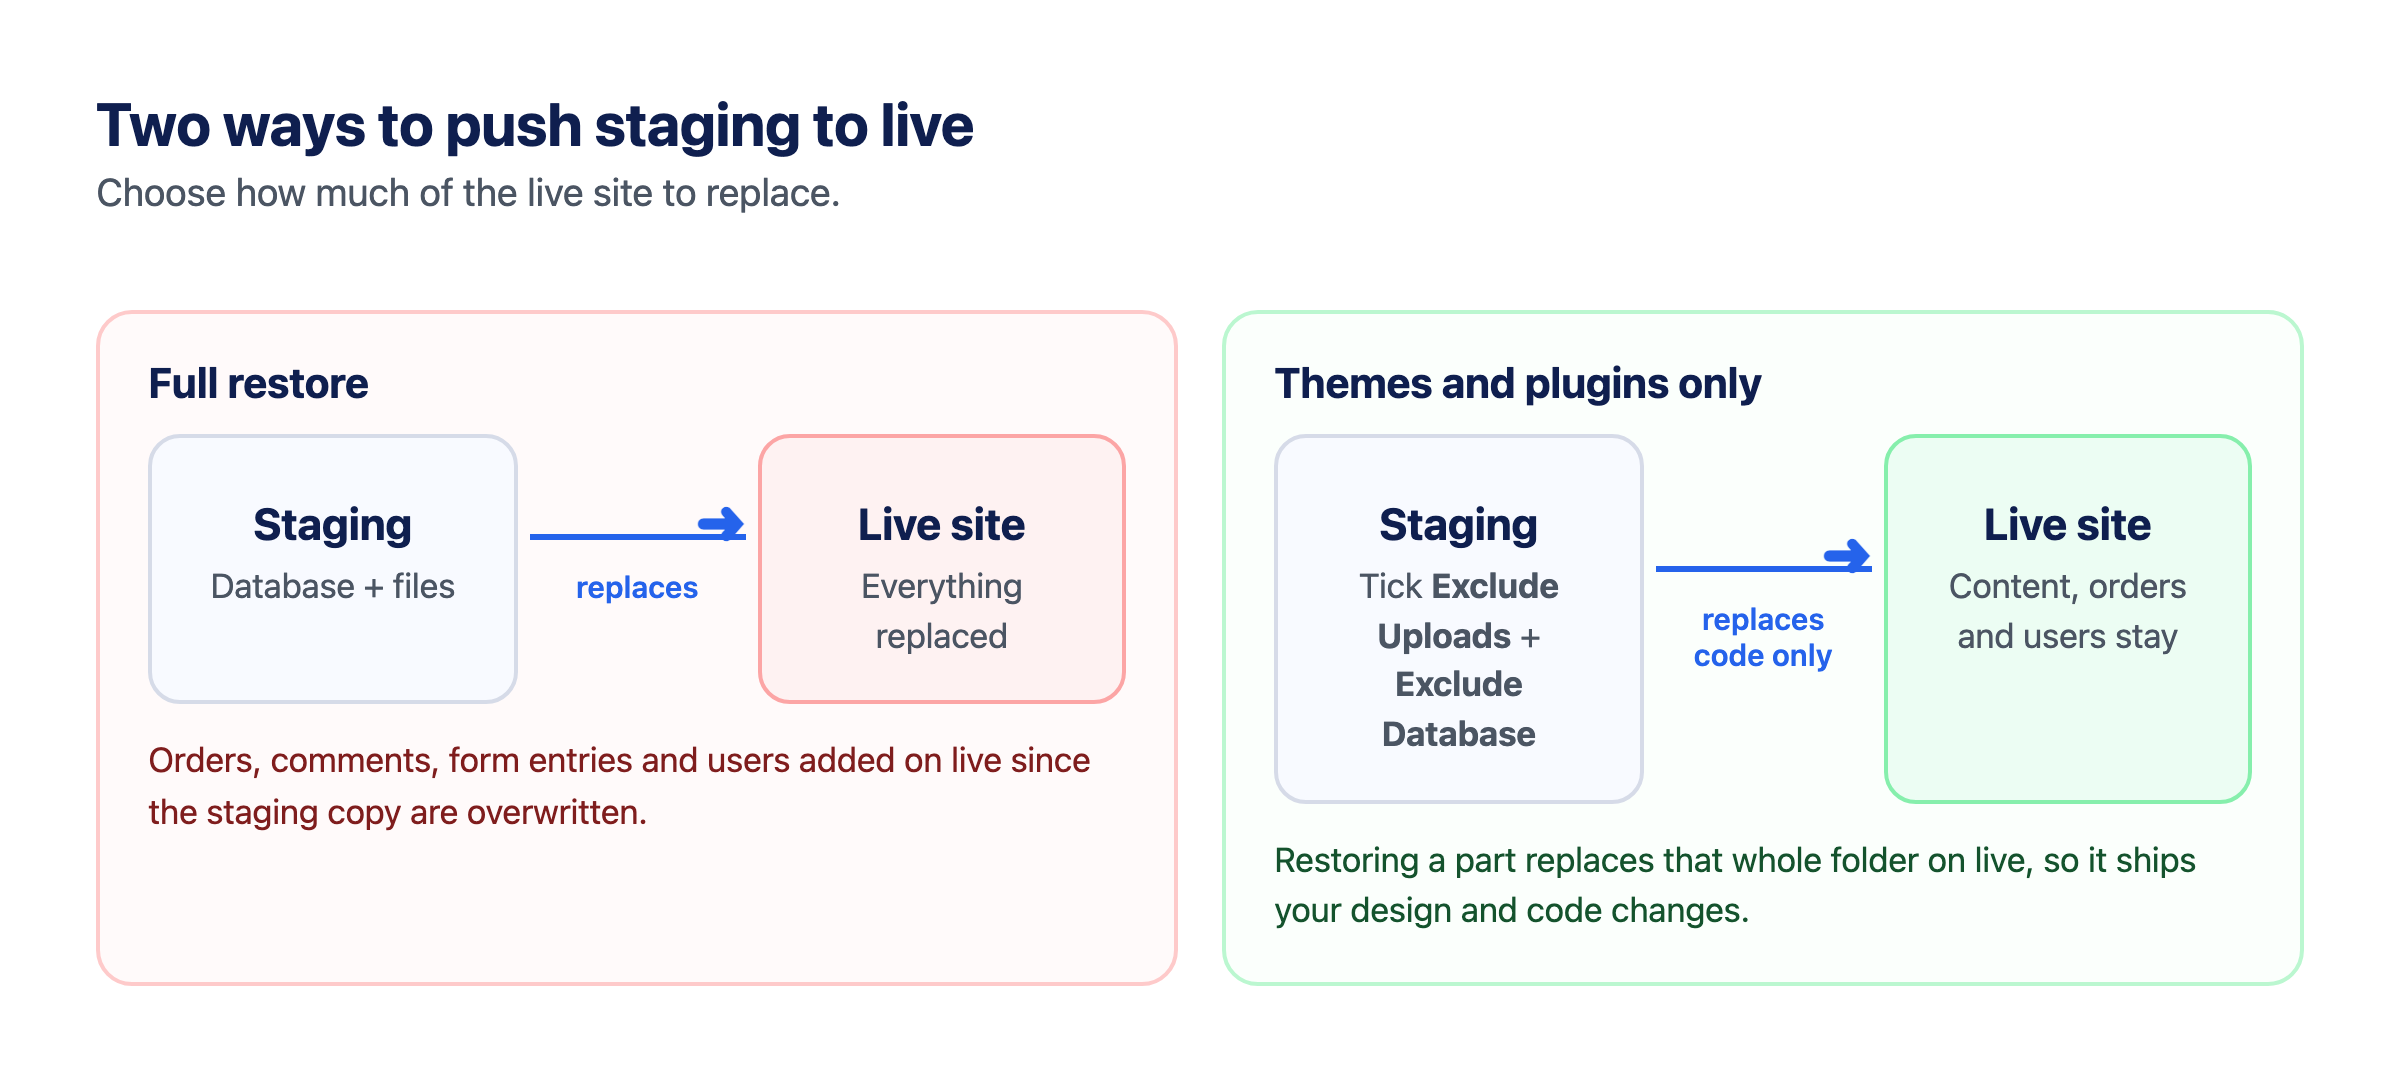
Restoring a staging backup on the live site replaces the live site, database and files. Anything added on the live site since the staging copy was made, such as orders, comments, form entries or new users, is overwritten.
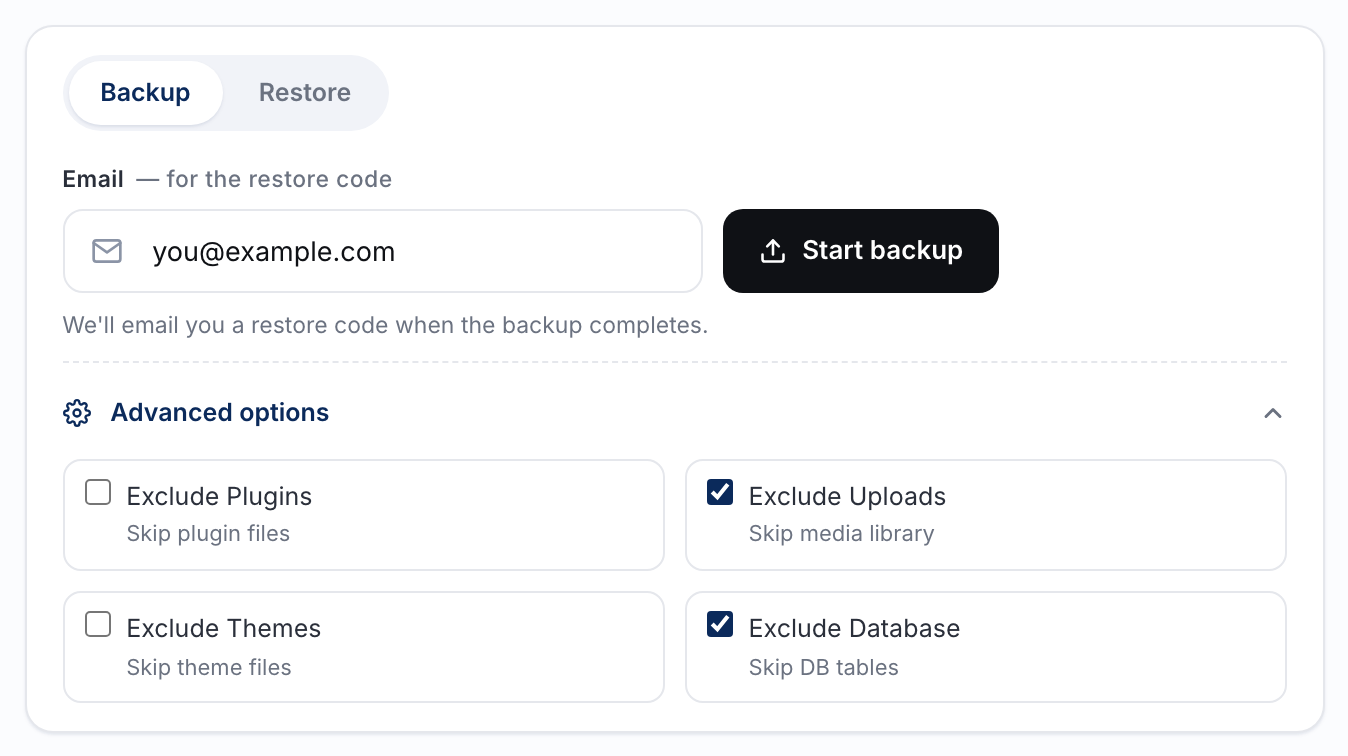
To push only design and code changes, open Advanced options on the staging site, tick Exclude Uploads and Exclude Database, then start the backup. Restore that code on the live site. Only themes and plugins are replaced, and the live database, with its content, orders and users, stays as it is. Restoring a part replaces that whole folder on the live site.
Copy the live site to staging
The same steps work the other way. Back up the live site and restore it on a staging install, such as a staging subdomain. The copy uses the staging site’s address.
Questions
Which local tools does it work with?
Any local WordPress install on PHP 7.4 or later that can reach the internet, including Local, XAMPP, MAMP, WampServer and Docker.
Do I need FTP or cPanel on the live server?
No. You need a WordPress login on the live site. If the live server has no WordPress yet, install it with your host’s installer first.
Related guides
- Migrate WordPress to a new host
- Change your WordPress domain name
- Migrate past a 512MB upload limit
- Migrate a WooCommerce store
- How to migrate a WordPress site: step-by-step backup & restore
Stuck? Ask on the 1-Click Migration support forum. Include your site’s domain, but never your restore code: anyone who has the code can restore your backup.
1-Click Migration is free, with no account or license key. Get it from WordPress.org.